
Notebooks
Use Notebooks to group your tasks, deadlines and routines in a way that makes sense to you. You might have one per course, one for wellbeing and one for a side project.
Anything you haven't put in a notebook goes into General, a built-in notebook that's always there so nothing gets lost.
In this article:
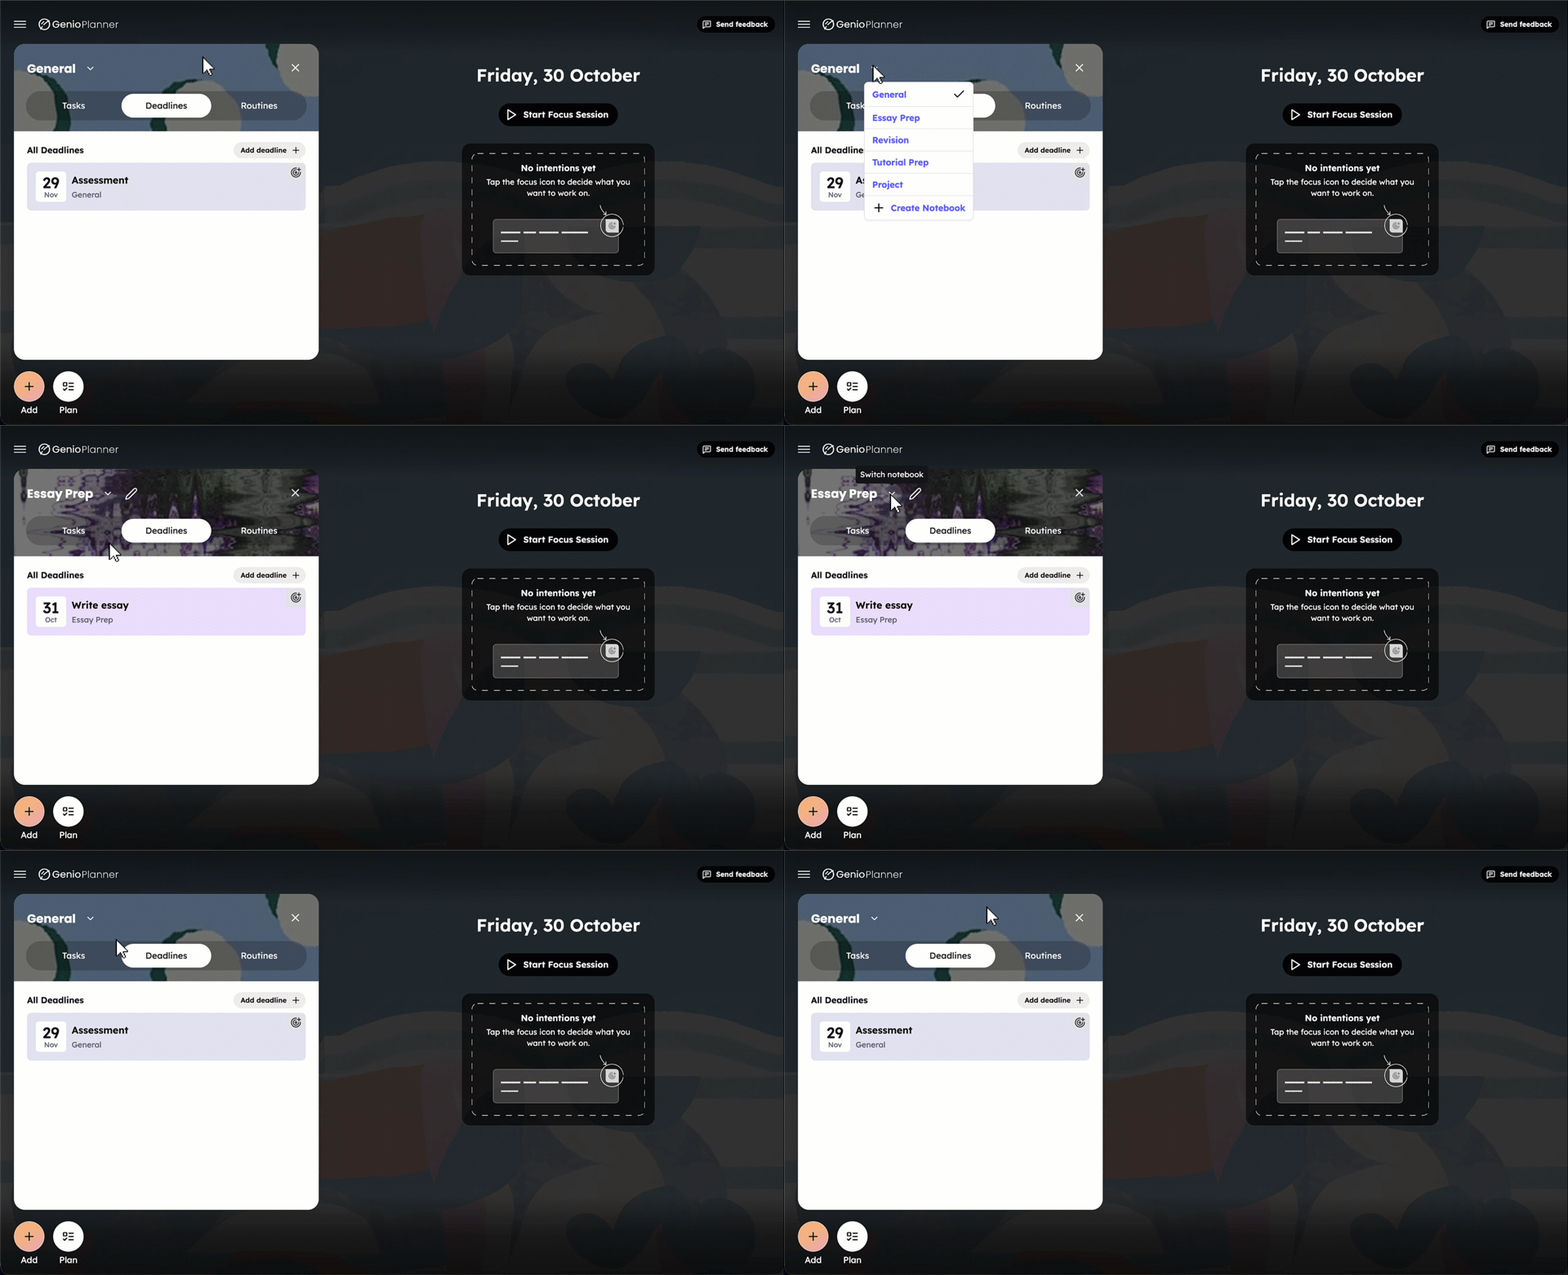
Move between notebooks
Plan shows one notebook at a time, with its name and cover at the top and Tasks, Deadlines and Routines tabs below.
To change notebook:
- Select the Switch notebook arrow next to the notebook's name.
- Choose a notebook from the list. The current one is marked.
You stay on the same tab, so if you were looking at Deadlines you'll see the new notebook's deadlines.
Create a notebook
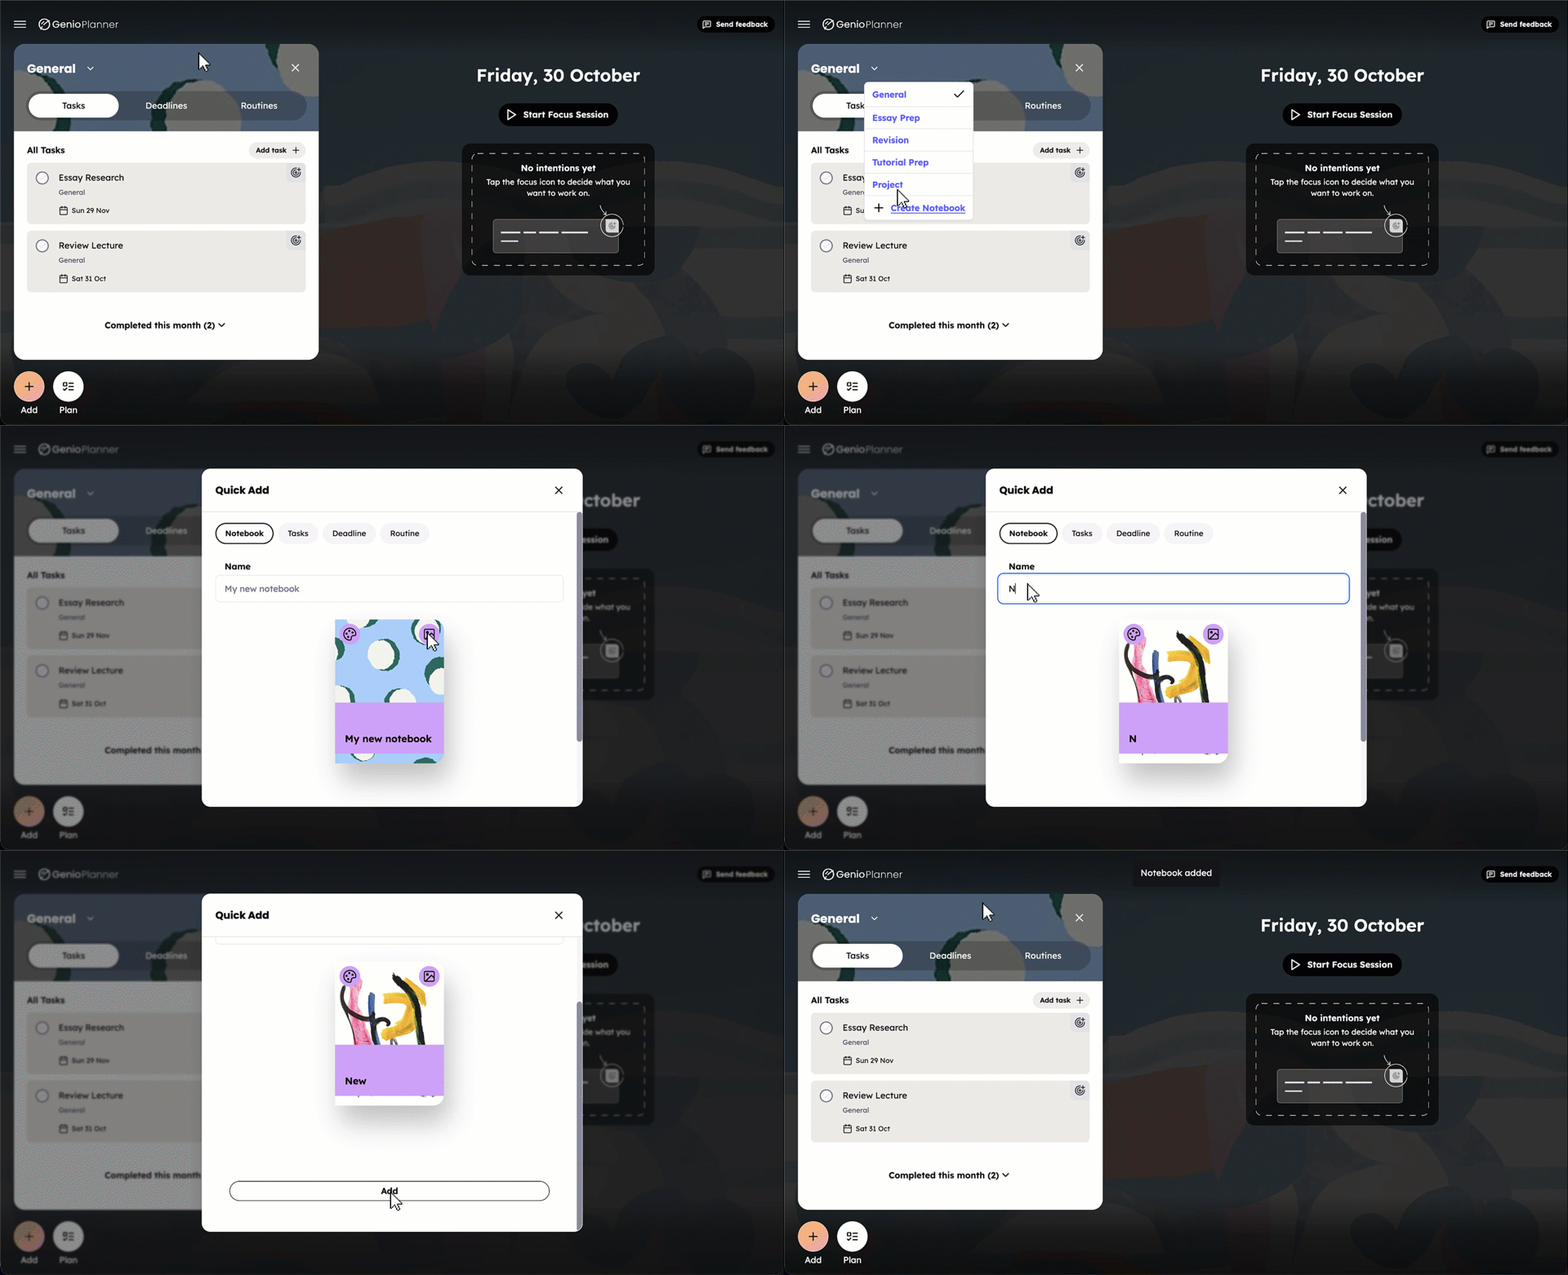
- Open Quick Add (+ / Add) and select the Notebook tab. You can also open Switch notebook and choose Create Notebook.
- Give the notebook a name.
- Pick a colour. There are 10: red, orange, yellow, green, teal, blue, purple, pink, warm and cool. A preview shows how it will look.
- Select Add.
New notebooks start with the Painted dots cover. You can change it afterwards, see Edit a notebook.
Edit a notebook
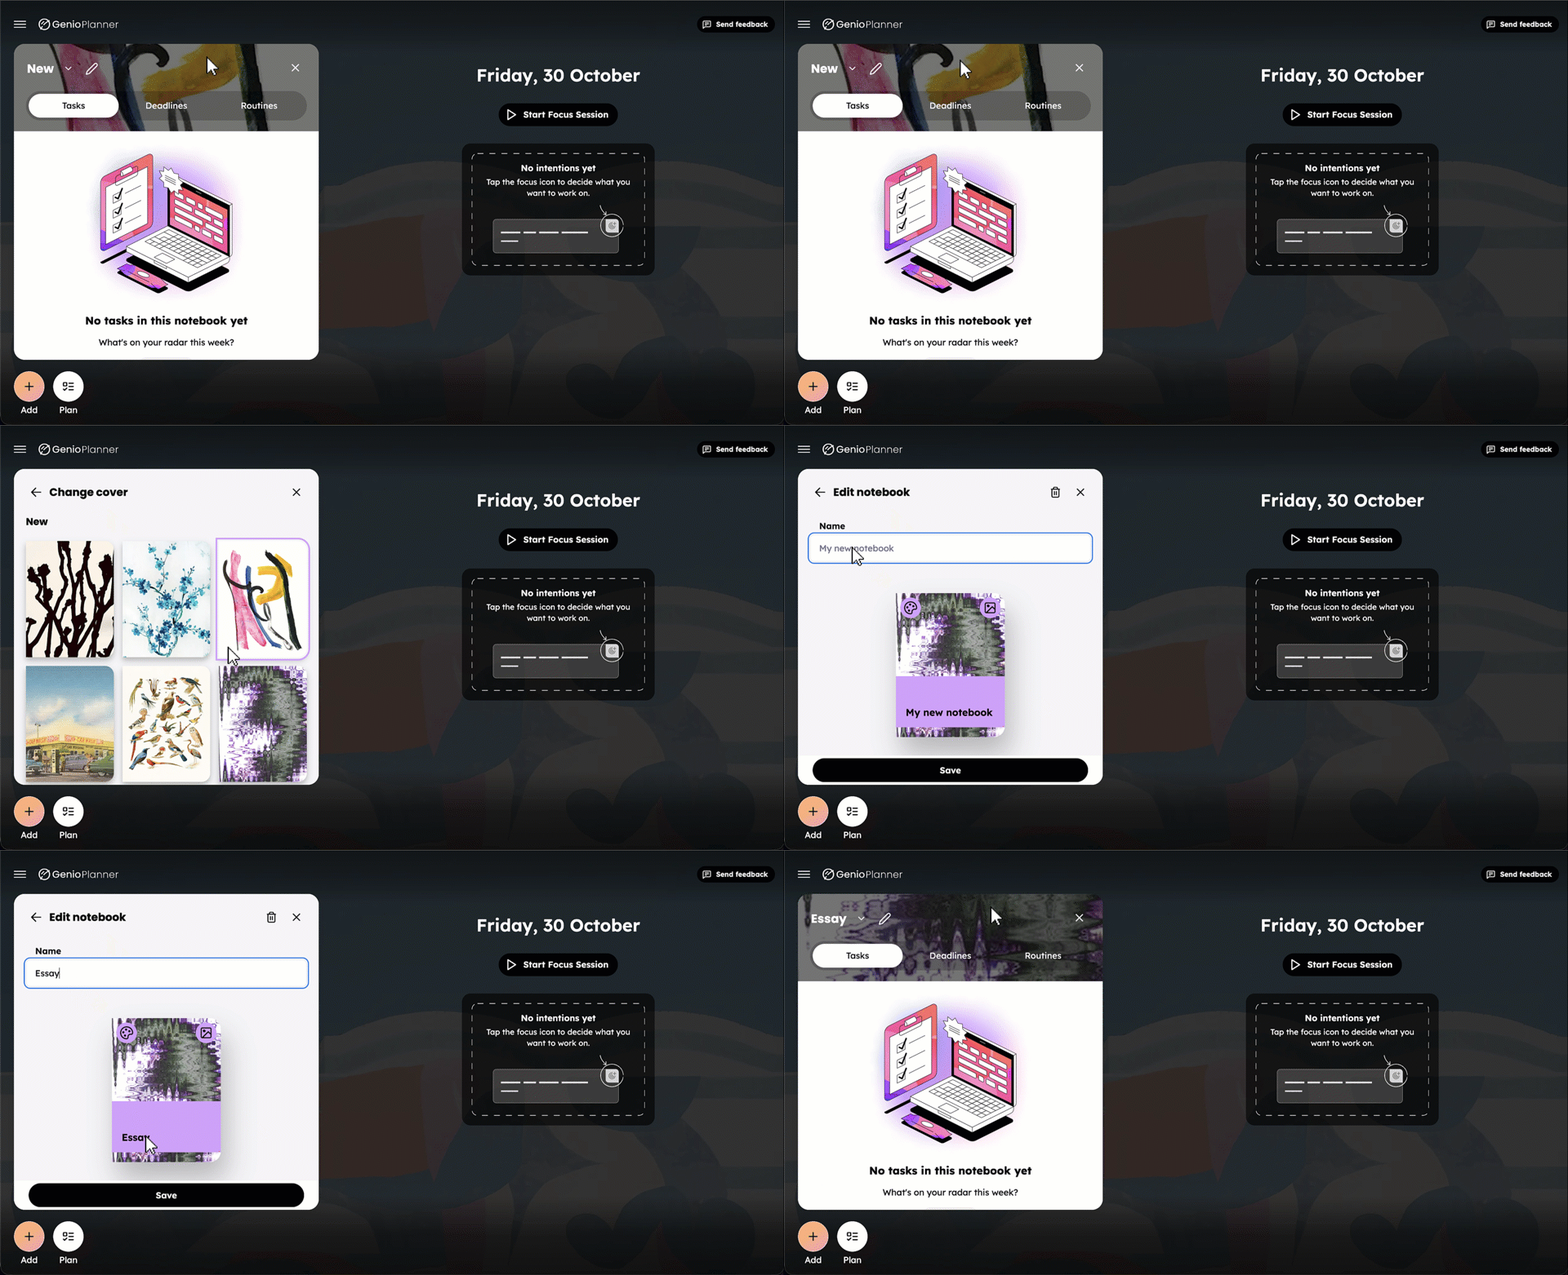
- Open the notebook in Plan.
- Select the pencil icon (Edit notebook) next to its name.
- Change the Name or pick a new colour. Changes save automatically.
- To change the cover, select Choose cover and pick from 14 designs. Your choice is saved straight away.
- Select Save to return.
Note: The General notebook can't be renamed, recoloured or deleted.
Delete a notebook
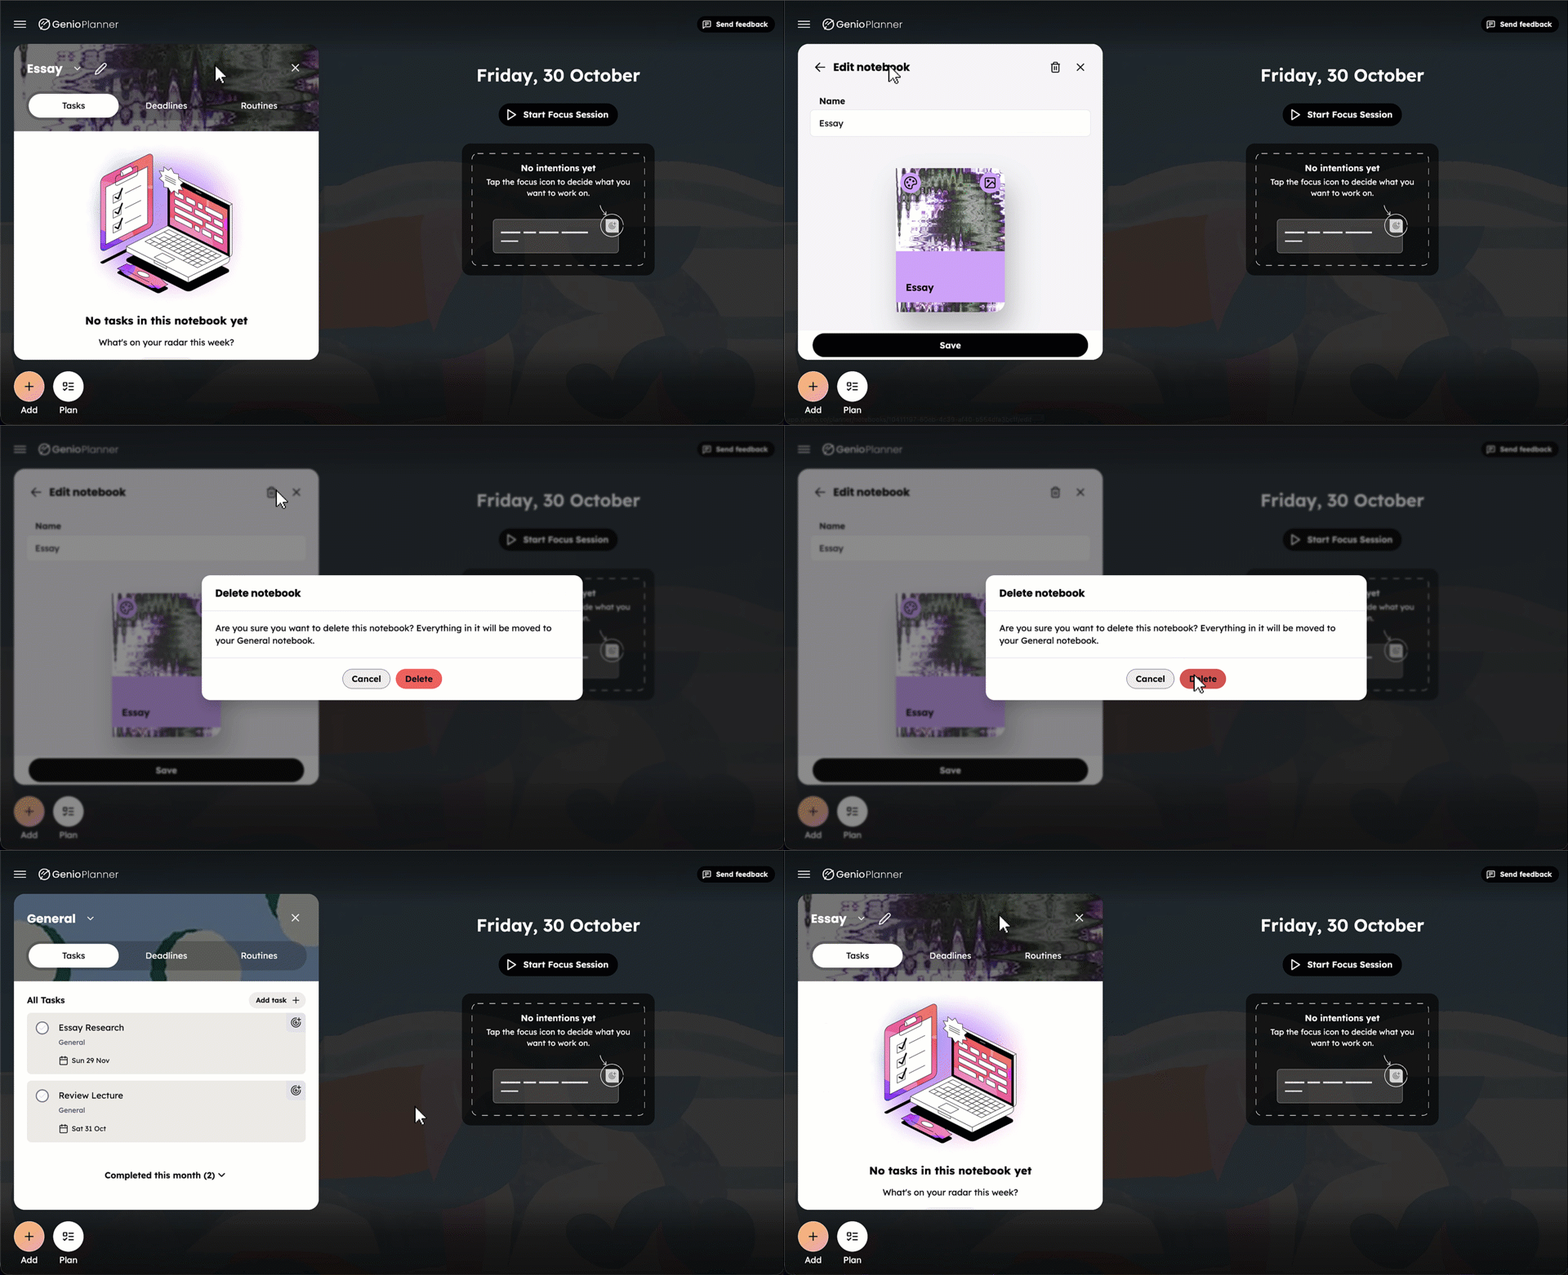
- Open the notebook and select Edit notebook (pencil icon).
- Select the bin icon (Delete notebook) at the top of the page.
- Select Delete to confirm.
Nothing inside the notebook is deleted. Its tasks, deadlines and routines move to your General notebook. Afterwards you'll be taken to General.
Next: track dated commitments in Deadlines, or manage individual to-dos in Tasks.