
Images
A picture is worth a thousand words, or so the saying goes. While we’re not sure if that’s always the case, we do know that you can’t always capture all the information you want from a lecture through text notes and slides alone.
That’s why we’ve developed Image Cards.
Image Cards enable you to supplement your notes with additional media such as photos, screenshots and GIFs, uploaded straight from your device or by searching the web. And if you’re recording an online class, you can instantly post a screenshot to your feed with a single click.
In this Guide:
- Uploading an image from your computer
- Searching the web for an image
- Taking a Screenshot
- Extract text from images (OCR)
- 1
-
Uploading an image from your computer
- Open the Event where you want to add the image.
- Start a new recording or navigate to the specific point in your existing audio.
- Select the ’Post Image button.

- Select import
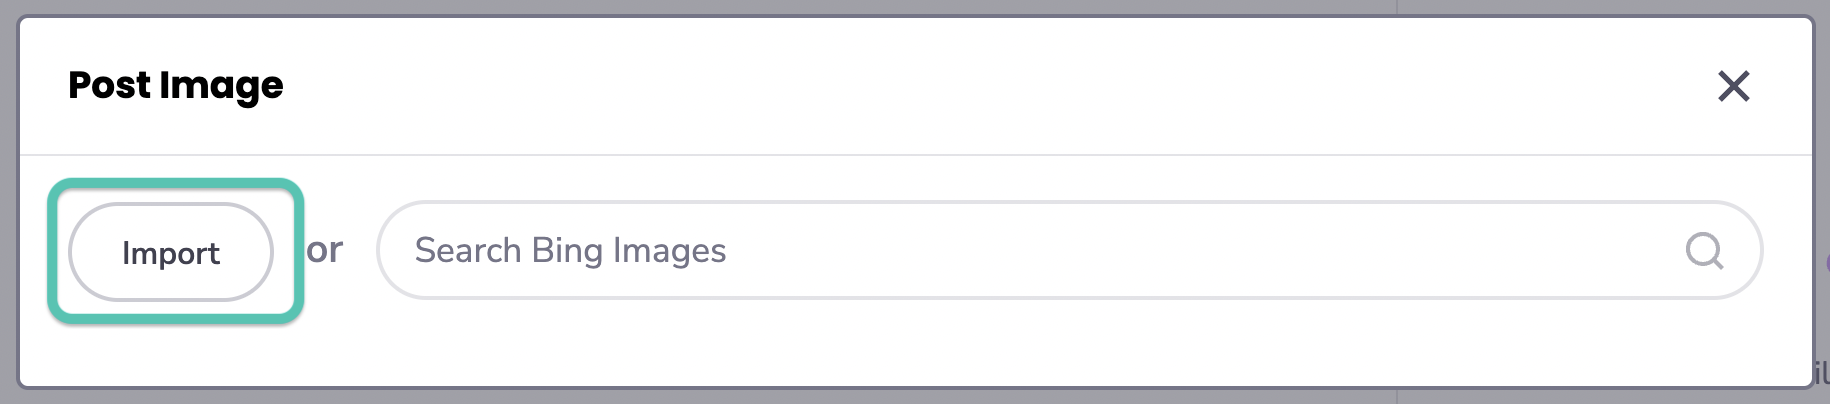
- From the file explorer, find and select the image you want to add.
- Voila! Your selected image will appear in your Event Feed at the desired point.
- 2
-
Searching the web for an image
- Open the Event where you want to add the image.
- Start a new recording or navigate to the specific point in your existing audio.
- Select the ’Post Image' button.

- Type your search term

- From the file explorer, find and select the image you want to add.
- That's it! Your selected image will appear in your Event Feed at the desired point.
Tip: If you want to adjust the audio boundaries associated with the Image Card, simply select the image and click on the time stamp for the image. You can then easily adjust the start and end points of this note. See here for more details.
- 3
-
Taking a Screenshot
You can also take a screenshot at any point while recording an online class.
-
Click the Record button, and select either of the ‘Screen Audio’ or ‘Screen Audio & Mic’ options.

-
At any point during the recording, select the ‘Post Screenshot’ button to take an instant snapshot of your lecture. This will automatically post to your Event Feed.

- 4
-
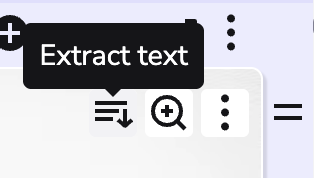
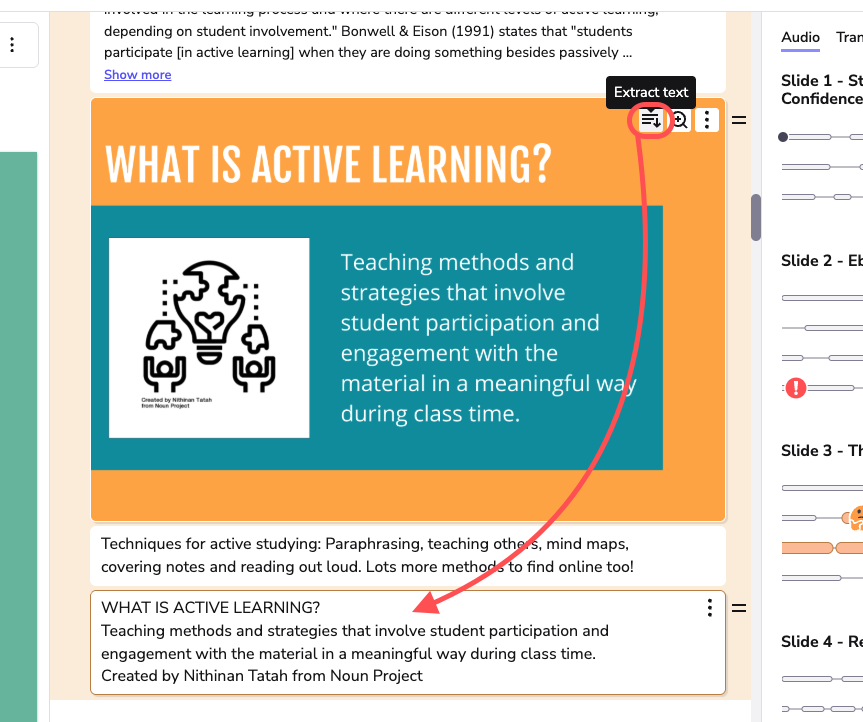
Extract text from images (OCR)
You can extract readable, editable text from images. Stop retyping! Instantly extract and edit text from any image or photo.
- Hover over your image and click the 'Extract Text' Icon:
- The text will be extracted into your notes feed.
Note - You can also extract text from your Scribble images. Click here for more info: https://help.genio.co/article/330-scribble#Extract-text-from-your-scribble-images-Optical-Character-Recognition-3N3wJ