
Manage User Access
There are several ways to manage your users' access to Genio:
Deactivating User Access
Deactivating User Access immediately moves the user into the off-boarding stages.
Click the Action Menu (three dots) next to their name and select Deactivate License.

In the pop-up message, confirm that you want to deactivate access, and the account will immediately enter off-boarding.
Info - To deactivate lots of users at once, you can select them from your list or upload a CSV file. See Bulk Deactivate Access.
Deactivating user access as a multi-product organisation
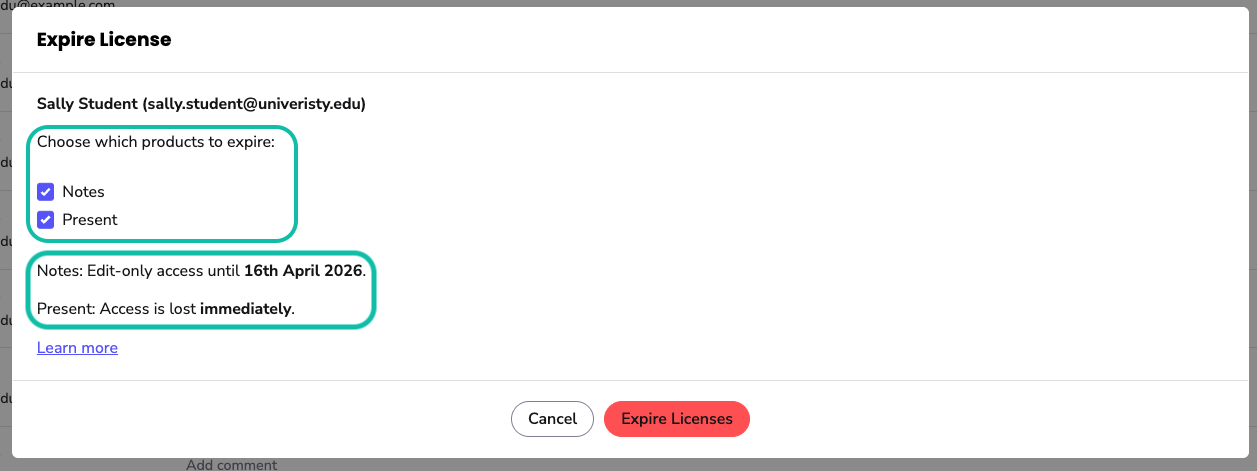
If a user has more than one product, choose which product to deactivate (Genio Notes, Genio Present or both).
For each product, you'll see the remaining access period, so you know how long the user's content will stay viewable during off-boarding. Click here to learn more.
Set an Expiry Date
You can set an expiry date for each user when you invite them, and at any time after they've signed up.
Each user's expiry date can be seen in the dashboard. If no date is set, then the user will have access to Genio until your Org account expires.
To set or change an expiry date, use the Action Menu (three dots) next to the user's name and select Edit User.

You can set an expiry date using the date picker and click Save Changes.
Users aren't notified when their expiry date changes. They'll receive an email in the last 7 days of access letting them know their access is about to expire and what to do next.
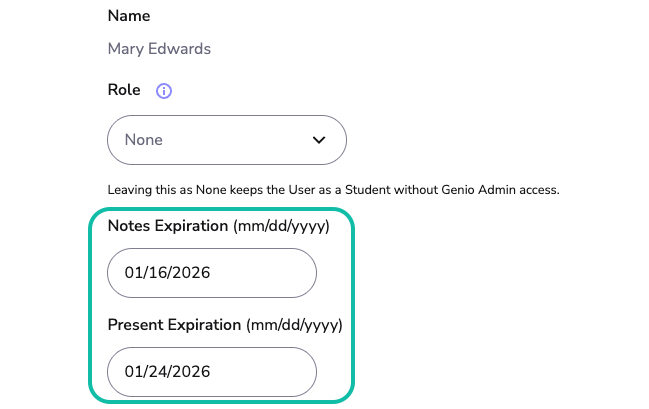
Setting an expiry date as a multi-product organisation
If you have more than one Genio product, you can set a separate expiry date for each product:
Bulk Edit User Expiry Dates
-
Go to the 'Users' tab. Select the checkbox next to each user account you wish to edit:

-
Click the calendar icon:

- Enter the new desired expiry date for the selected users or use the calendar. Click 'Save Changes'


Info: To edit the expiry date of a deactivated user, you'll need to reactivate them first. Bulk reactivation is something we're hoping to bring in a future update.
If you are a multi-product organisation, the new date applies to all the selected users' active licences. Expired licences aren't affected. To set separate expiry dates for each product, edit the user individually.