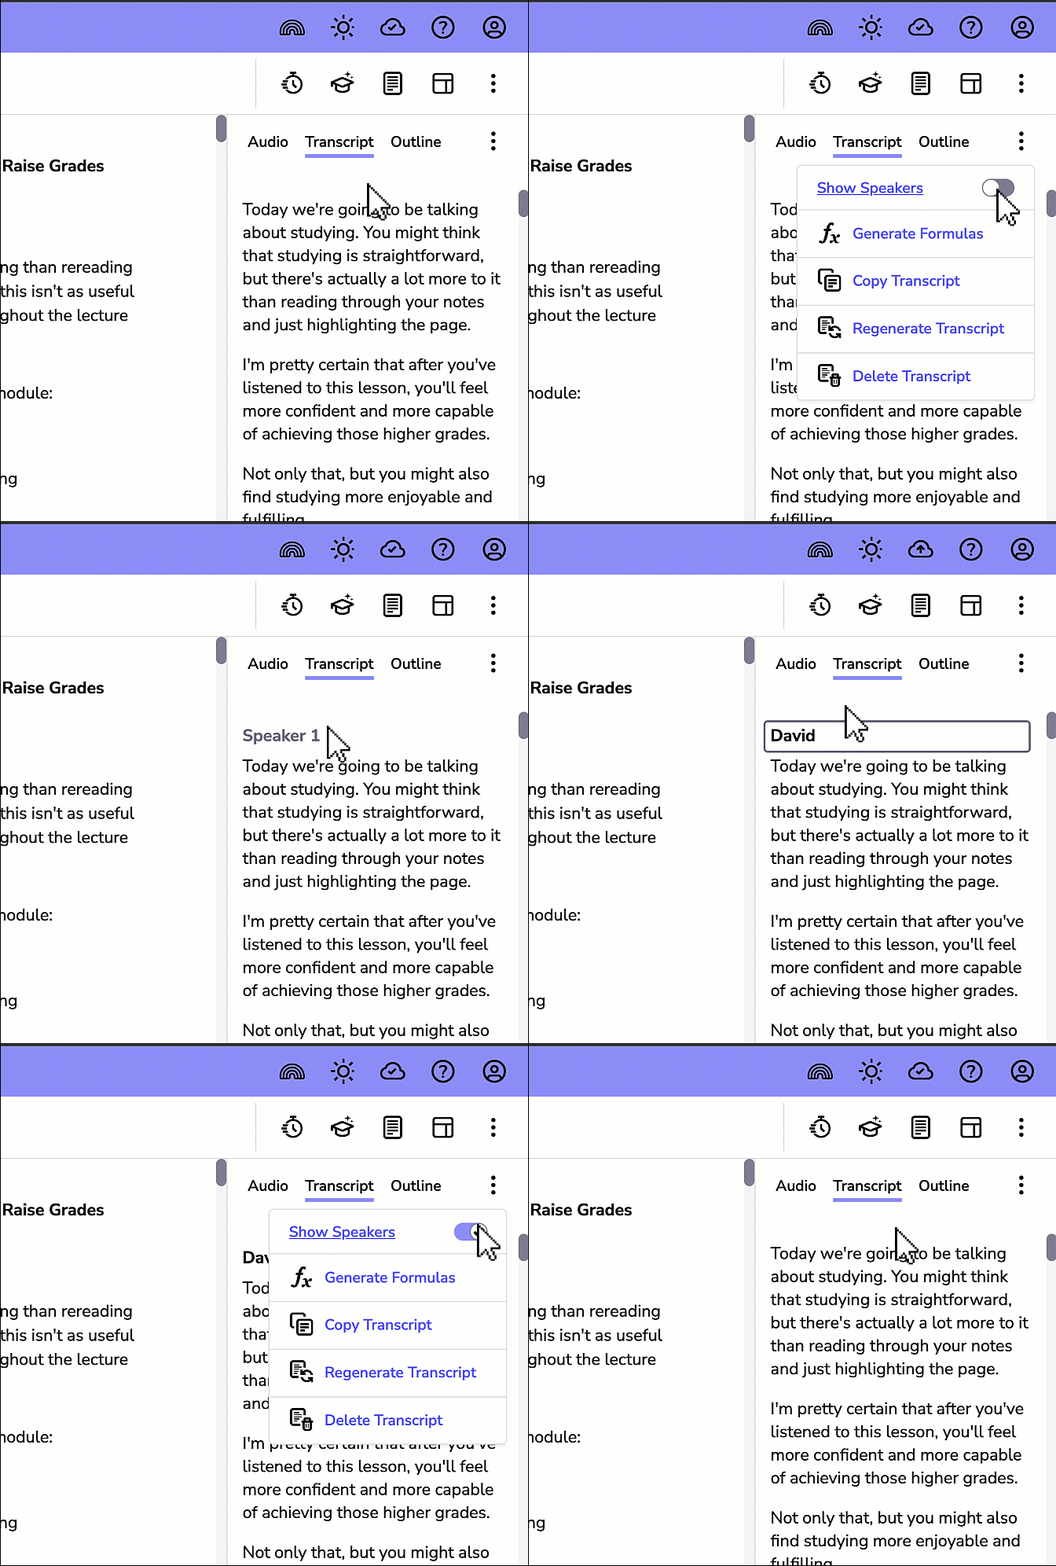
Transcript Options Menu
Note – This guide applies to Genio Notes on your browser, desktop app, and new mobile app 📱
Within the Transcription tab, you can access further menu options for managing your transcript.
- Copying into another application
- Printing your transcript
- Regenerating your transcript
- Deleting your transcript
- Viewing Headers & Slides in your Transcript
- Identify voices in your transcript
Just click the three vertical dots in the top right corner to display the drop-down menu.

We have a full, separate guide on detecting formulas in your transcript. To find out more, click https://help.genio.co/article/412-formulas-in-transcipts
Copying into another application
If you need your transcript in another application, then you can quickly copy the whole thing to your clipboard, ready to paste into your other app.
Click the three dots in the top right and select 'Copy Transcript', and then use your normal paste shortcut keys to add that to your other app (CTRL+V or CMD+V)
Printing your transcript
If you need a separate copy of your transcript, you can print or save this as a PDF for a digital copy. To do this, select the three-dot transcription option menu and select ' Print Transcript'.
Regenerating your transcript
Regenerate your transcript by clicking the three dots in the top right corner and selecting 'Regenerate Transcript.' You can also change the language for the regeneration.
Deleting your transcript
Sometimes things don't go as planned, and you might want to delete your transcript and start again. To do this, click the three dots in the top right and select 'Delete Transcript'.
Viewing Headings & Slides in your Transcript
You can see the Headings and Slides you've added in your Notes Feed, in your Transcript.
To turn this on, click the three dots in the top right corner and toggle on 'Show Headings & Slides' in the options menu.
Identify Voices in your Transcript
Our Speaker Diarisation feature automatically sorts out who said what in your audio recordings.
When turned on, your transcript will no longer be a solid wall of text. Instead, this feature analyses the different voices and tags each segment with a speaker label (like Speaker 1, Speaker 2, and so on). This instantly transforms your simple transcript into a clear, structured conversation, making it much easier to follow multi-person meetings, interviews, or lectures.
Best of all, you can easily edit those speaker labels to use real names for perfect organisation and clarity.